
自分のアプリを全てのiPhoneのサイズに対応したい!
アプリをリリースしたいけど、多画面対応の方法がわからない
AutoLayoutがわからない!
このような疑問を持っている人向け。
今回はAutoLayoutを使わずに多画面対応する方法を紹介します!
ぜひご覧ください〜。
本記事で紹介すること
- AutoLayoutって何?
- 多画面対応をどうやってしたら良いの?
- 多画面対応をする方法
AutoLayoutって何?

まずAutoLayoutとは何か簡単に説明しておきます。
AutoLayoutとは、画面サイズが変わってもパーツを良い感じに配置してくれる設定のことです。
めっちゃ便利な機能なんですが、難しいです。
あ私はAutoLayoutを使ってみて2回くらい挫折してます笑
もし、AutoLayoutを習得して楽したい!という方は他の方の記事をご覧ください!
本記事ではAutoLayoutを使わない方法を紹介していきます〜。
多画面対応をどうやってしたら良いの?

AutoLayoutを使わないで多画面対応をする方法として「iPhoneの画面サイズ分のStoryBoardを作る」という方法があります。
具体的には以下の画面サイズのStoryBoardを作る必要があります。
- 4inch(iPhoneSE)
- 4.7inch(iPhone8)
- 5.5inch(iPhone8 plus)
- 5.8inch(iPhone11Pro)
- 6.5inch(iPhone11&iPhone11ProMax)
4inchは対応しなくても良いはずですが、iPhoneSEユーザーのために作った方が良いと思います。
合計5つのStoryBoardを作る事になります。
多画面対応をする方法
それでは早速、多画面対応をする方法を説明していきたいと思います。
Storyboardを作る
まずはMainStoryBoardでデザインを作ってください。サイズはなんでも良いですが自分の持っているスマホのサイズで作ると良いと思います!
作成できたら、他のサイズのStoryBoardを作っていきます。
「⌘ + n」を押して「Storyboard」を選択してください。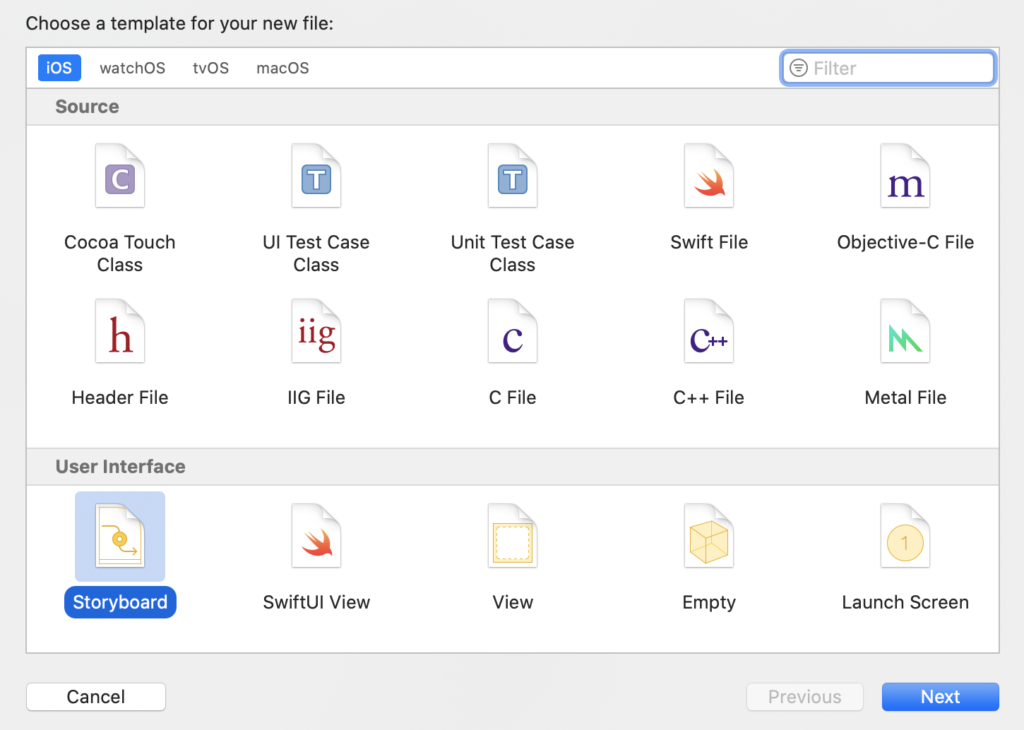
名前は画面サイズをつけておけば大丈夫です。4inchのStoryboardなら「4inch」と入力したらOKです!
作成できたらMain.storyboardのViewを全てコピー(⌘ + c)して新しく作ったStoryboardに貼り付けてください!
新しいStoryboardの下の方に画面サイズを変更できるボタンがあるので今作りたいサイズを選択してください。「4inch.storyboard」だったら4inch(右から2番目)です。
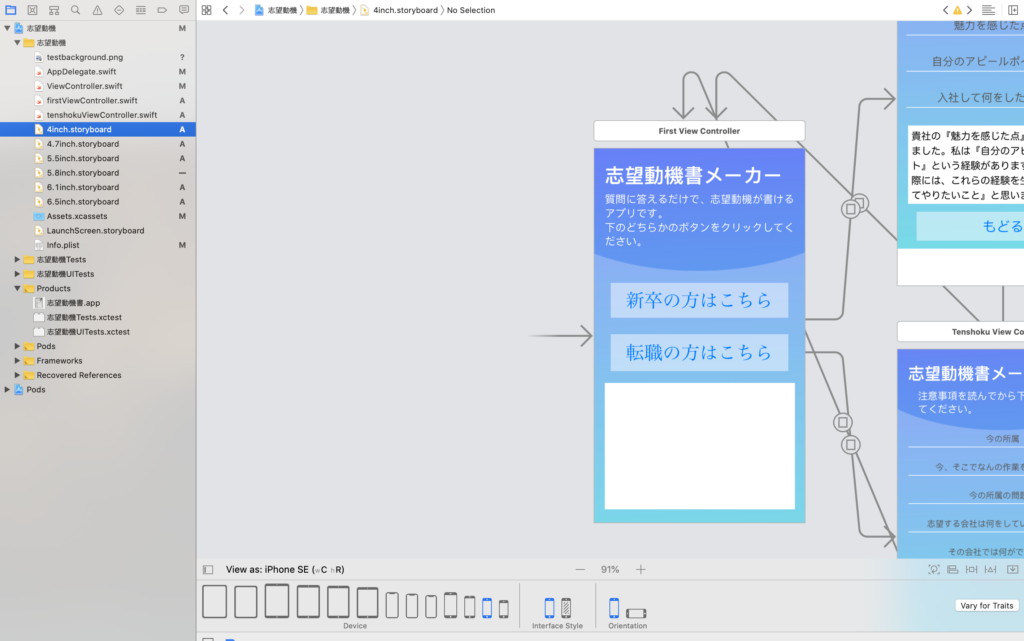
あとは、良い感じに合わせていくだけです!
この作業を繰り返して5つのStoryboardを完成させましょう〜。
起動時にStoryboardを変える
それではStoryboardができたと思うので「アプリ起動時にユーザーにあったStoryboardを表示する」ためのコードを記述していきます。
Appdelegate.swiftを開いて以下を記入してください!
@UIApplicationMain

class AppDelegate: UIResponder, UIApplicationDelegate {
   //ここから下を追記
    var window: UIWindow?
    var iphone5 : CGRect = CGRect(x: 0.0, y: 0.0, width: 320.0, height: 568.0)
    var iphone6 : CGRect = CGRect(x: 0.0, y: 0.0, width: 375.0, height: 667.0)
    var iphone6Plus : CGRect = CGRect(x: 0.0, y: 0.0, width: 414.0, height: 736.0)
    var iphoneX : CGRect = CGRect(x: 0.0, y: 0.0, width: 375.0, height: 812.0)
    var iphoneXR : CGRect = CGRect(x: 0.0, y: 0.0, width: 414.0, height: 896.0)
    var iphoneXsMax : CGRect = CGRect(x: 0.0, y: 0.0, width: 414.0, height: 896.0)
func application(_ application: UIApplication, didFinishLaunchingWithOptions launchOptions: [UIApplication.LaunchOptionsKey: Any]?) -> Bool {

     //ここから下を追記

        let screenWidth = Int( UIScreen.main.bounds.size.width);
        //スクリーンの高さ
        let screenHeight = Int(UIScreen.main.bounds.size.height);

        if(screenHeight == Int(iphone5.width) && screenWidth == Int(iphone5.height)){
            let storyboard: UIStoryboard = UIStoryboard(name: "4inch", bundle: Bundle.main)
            let mainViewController: UIViewController = (storyboard.instantiateInitialViewController() as UIViewController?)!
            self.window?.rootViewController = mainViewController
            NSLog("iphone5")
        }else if(screenHeight == Int(iphone6.width) && screenWidth == Int(iphone6.height)){
            let storyboard: UIStoryboard = UIStoryboard(name: "4.7inch", bundle: Bundle.main)
            let mainViewController: UIViewController = (storyboard.instantiateInitialViewController() as UIViewController?)!
            self.window?.rootViewController = mainViewController
            NSLog("iphone6")
        }else if(screenHeight == Int(iphone6Plus.width) && screenWidth == Int(iphone6Plus.height)){
            let storyboard: UIStoryboard = UIStoryboard(name: "5.5inch", bundle: Bundle.main)
            let mainViewController: UIViewController = (storyboard.instantiateInitialViewController()as UIViewController?)!
            self.window?.rootViewController = mainViewController
            NSLog("iphone6Plus")
        }else if(screenHeight == Int(iphoneX.width) && screenWidth == Int(iphoneX.height)){
            let storyboard: UIStoryboard = UIStoryboard(name: "5.8inch", bundle: Bundle.main)
            let mainViewController: UIViewController = (storyboard.instantiateInitialViewController()as UIViewController?)!
            self.window?.rootViewController = mainViewController
            NSLog("iphoneX")
        }else if(screenHeight == Int(iphoneXR.width) && screenWidth == Int(iphoneXR.height)){
            let storyboard: UIStoryboard = UIStoryboard(name: "6.5inch", bundle: Bundle.main)
            let mainViewController: UIViewController = (storyboard.instantiateInitialViewController()as UIViewController?)!
            self.window?.rootViewController = mainViewController
            NSLog("iphoneXr")
        }else if(screenHeight == Int(iphoneXsMax.width) && screenWidth == Int(iphoneXsMax.height)){
            let storyboard: UIStoryboard = UIStoryboard(name: "6.5inch", bundle: Bundle.main)
            let mainViewController: UIViewController = (storyboard.instantiateInitialViewController()as UIViewController?)!
            self.window?.rootViewController = mainViewController
            NSLog("iphoneXsmax")

        }

     //ここから下は最初から記入済み
        return true
    }
これで、スマホのサイズに合わせてStoryboardが変わるようになったと思います!
少し大変ですが、この方法だと表示が崩れることもないので安心ですね。
以上、Swiftで多画面対応をする方法でした〜。
もし、画面が変わらない!という方は以下の記事もご覧ください↓